
MOD - Formula style Rim for Logitech G923 (XBOX - PC)
Check out the "how to install" section before you buy.
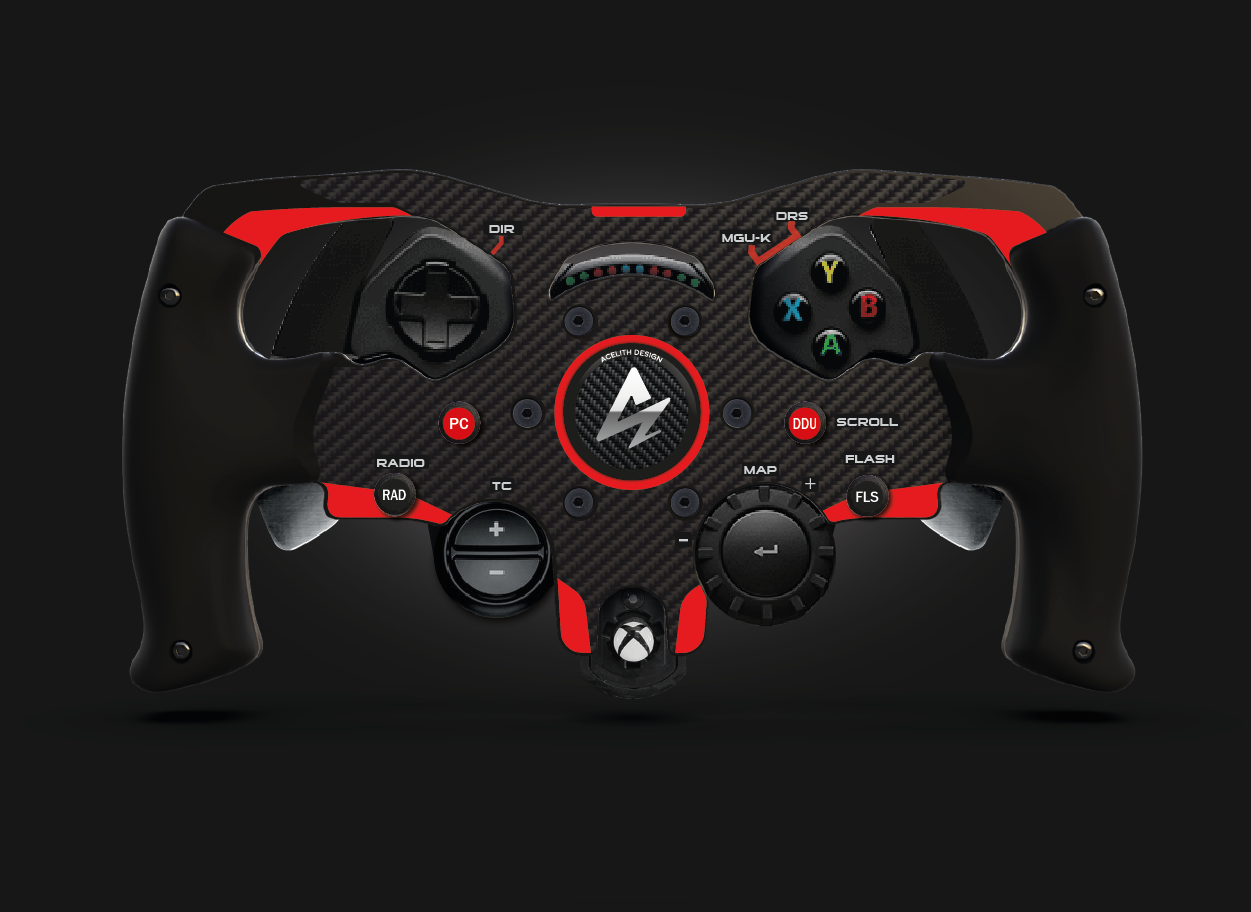
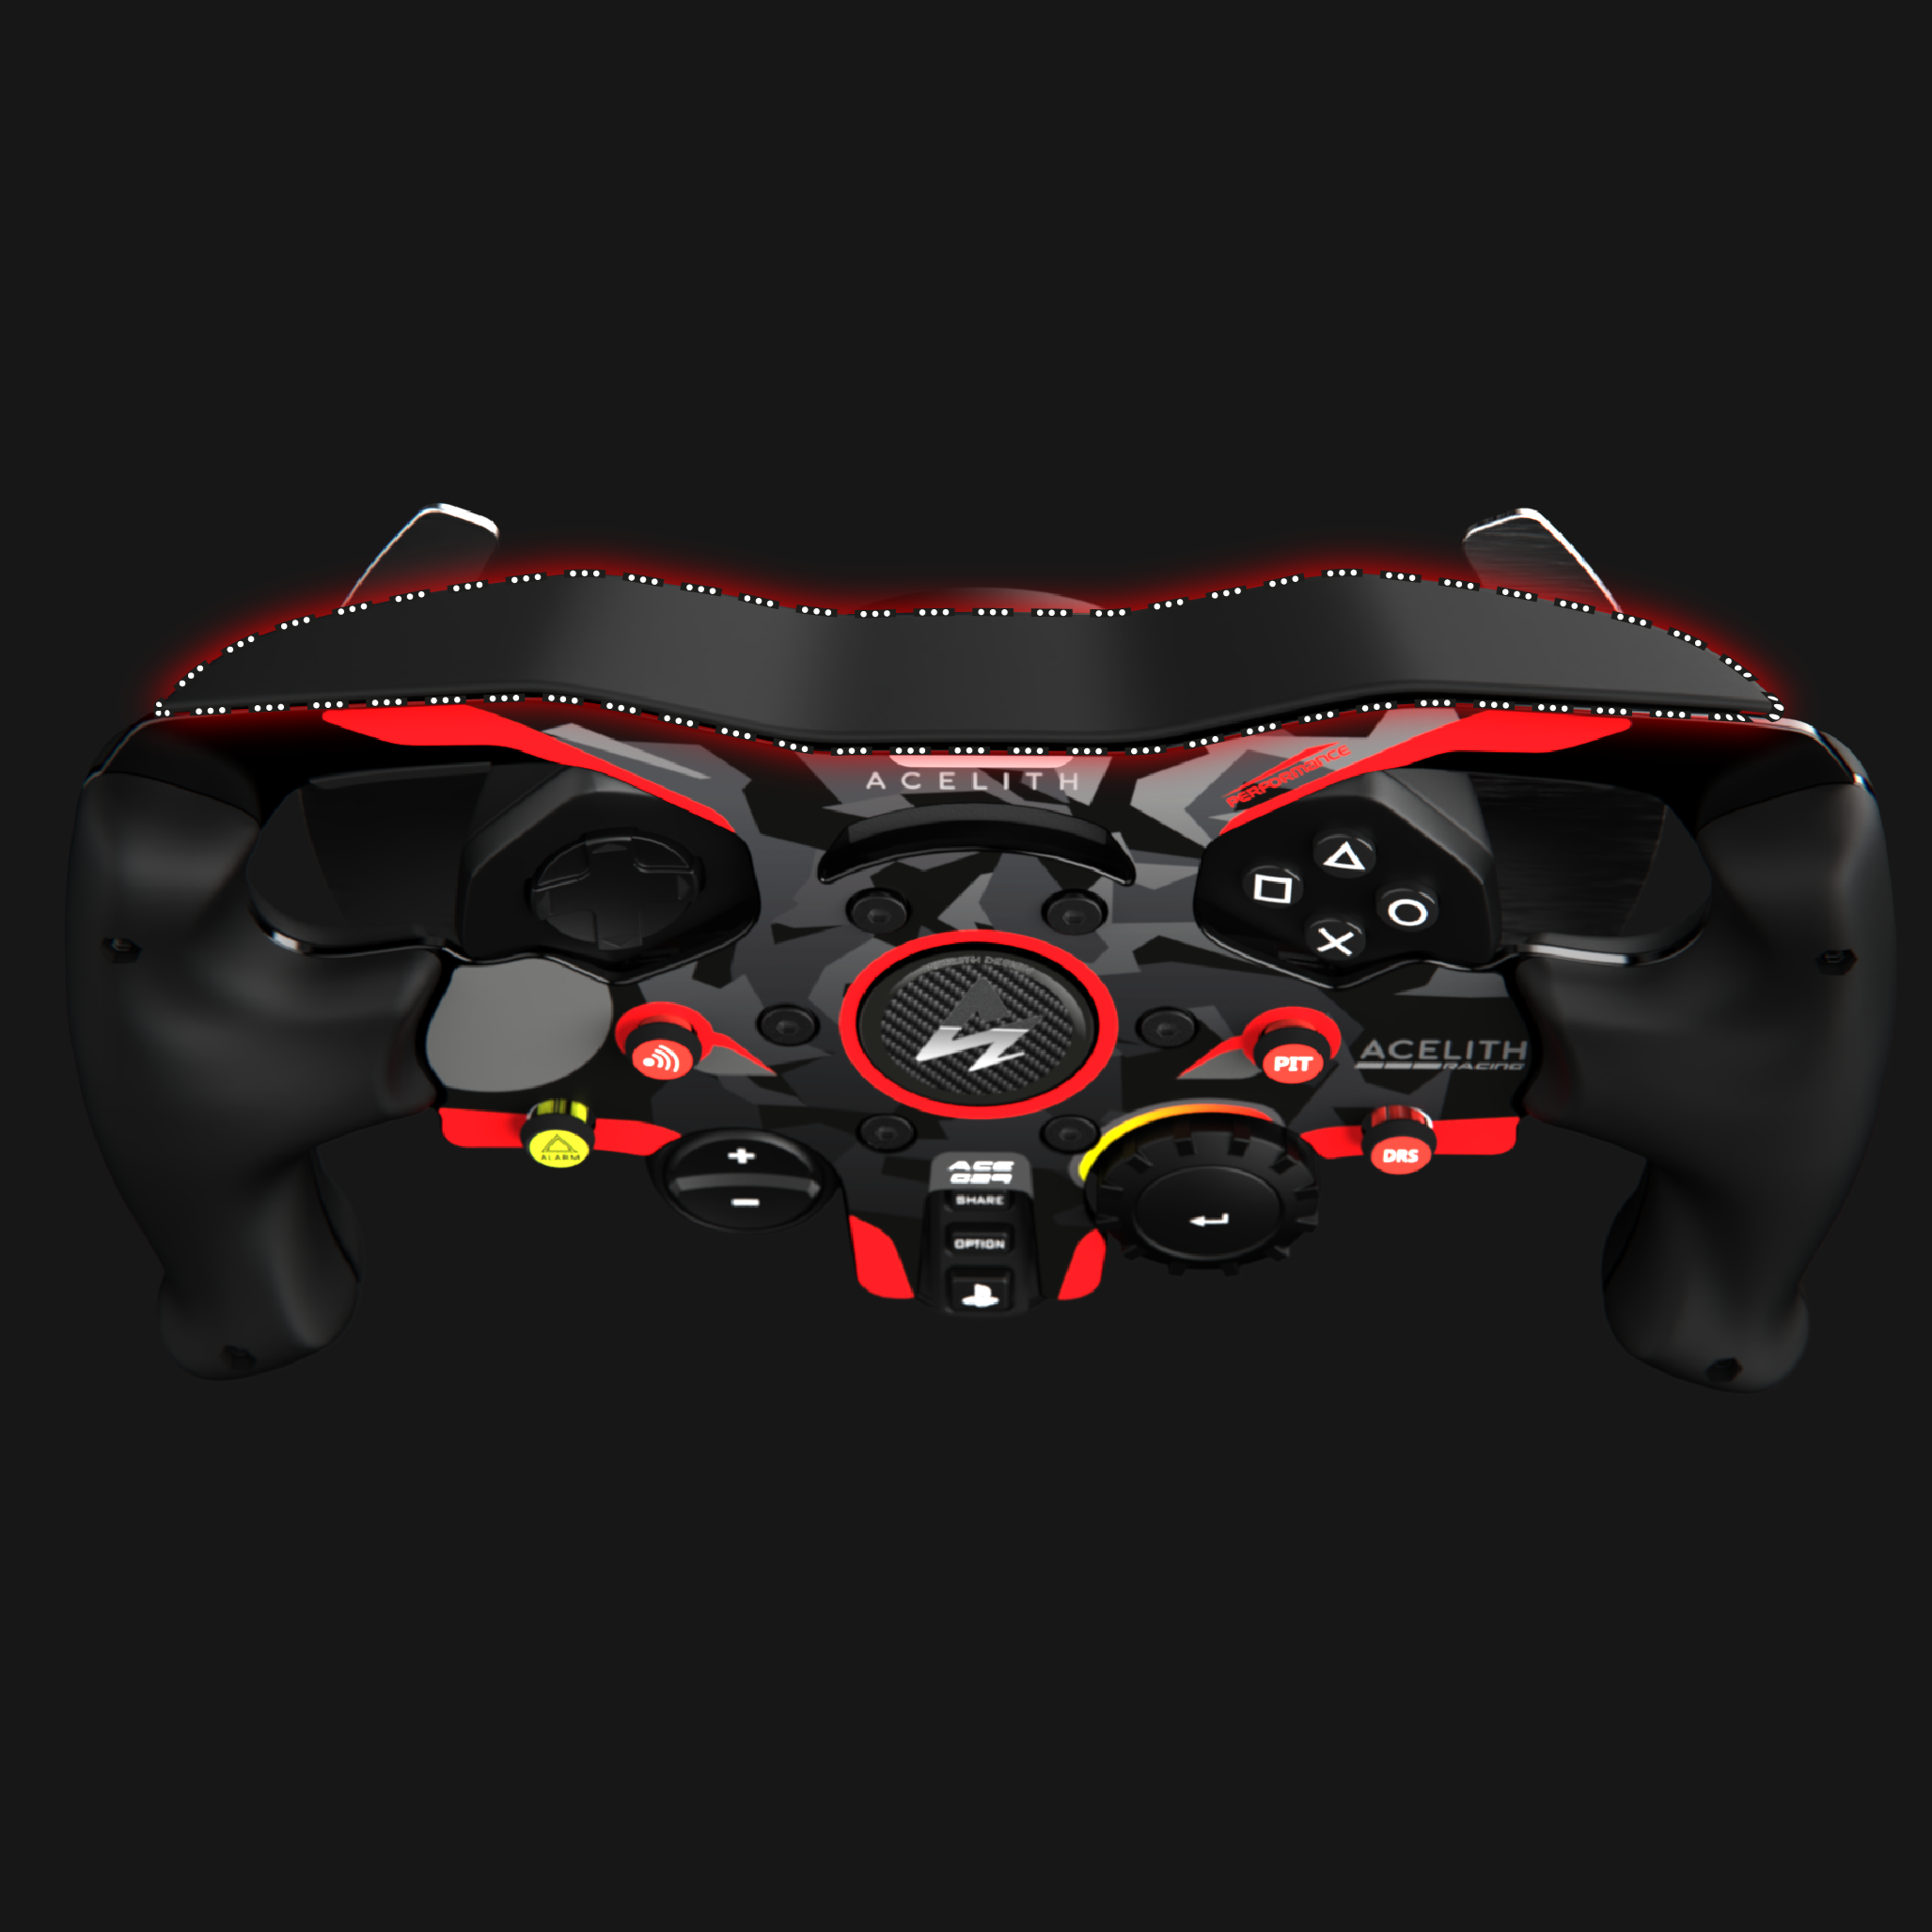
Mod for Logitech G923 (XBOX), open wheel (F1) style, 28cm.
The mod includes:
- Laser Cut, black painted steel plate, covered with carbon fiber vinyl.
- (NEW) Set of handles with STP (Soft Touch Paint). Thanks to the soft touch paint, the handles offer a "rubbery" effect, even though they are made of hard plastic.
- Coloured stickers already installed;
- "Acelith" central sticker included;
- A kit of universal stickers to customize the controls (DRS, RADIO etc with black background);
- A kit of ROUND stickers;
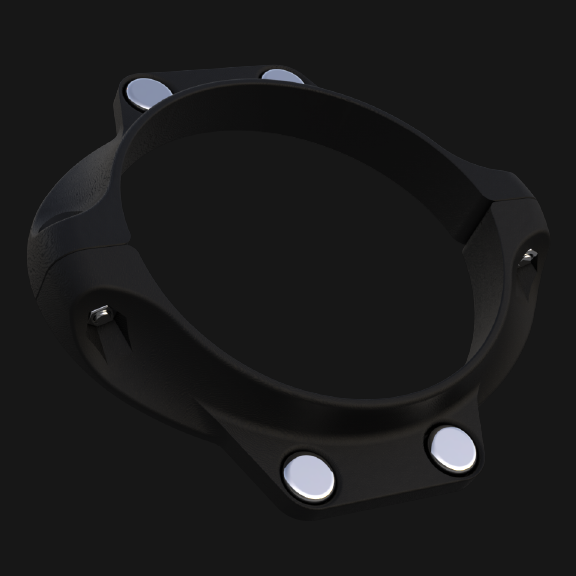
- Spacer, screws and nuts;
- L2, L3, R2 and R3 buttons.
Premium livery masks cost 5€ (they replace the carbon film).
Requirements:
- A Logitech G923 (xbox version);
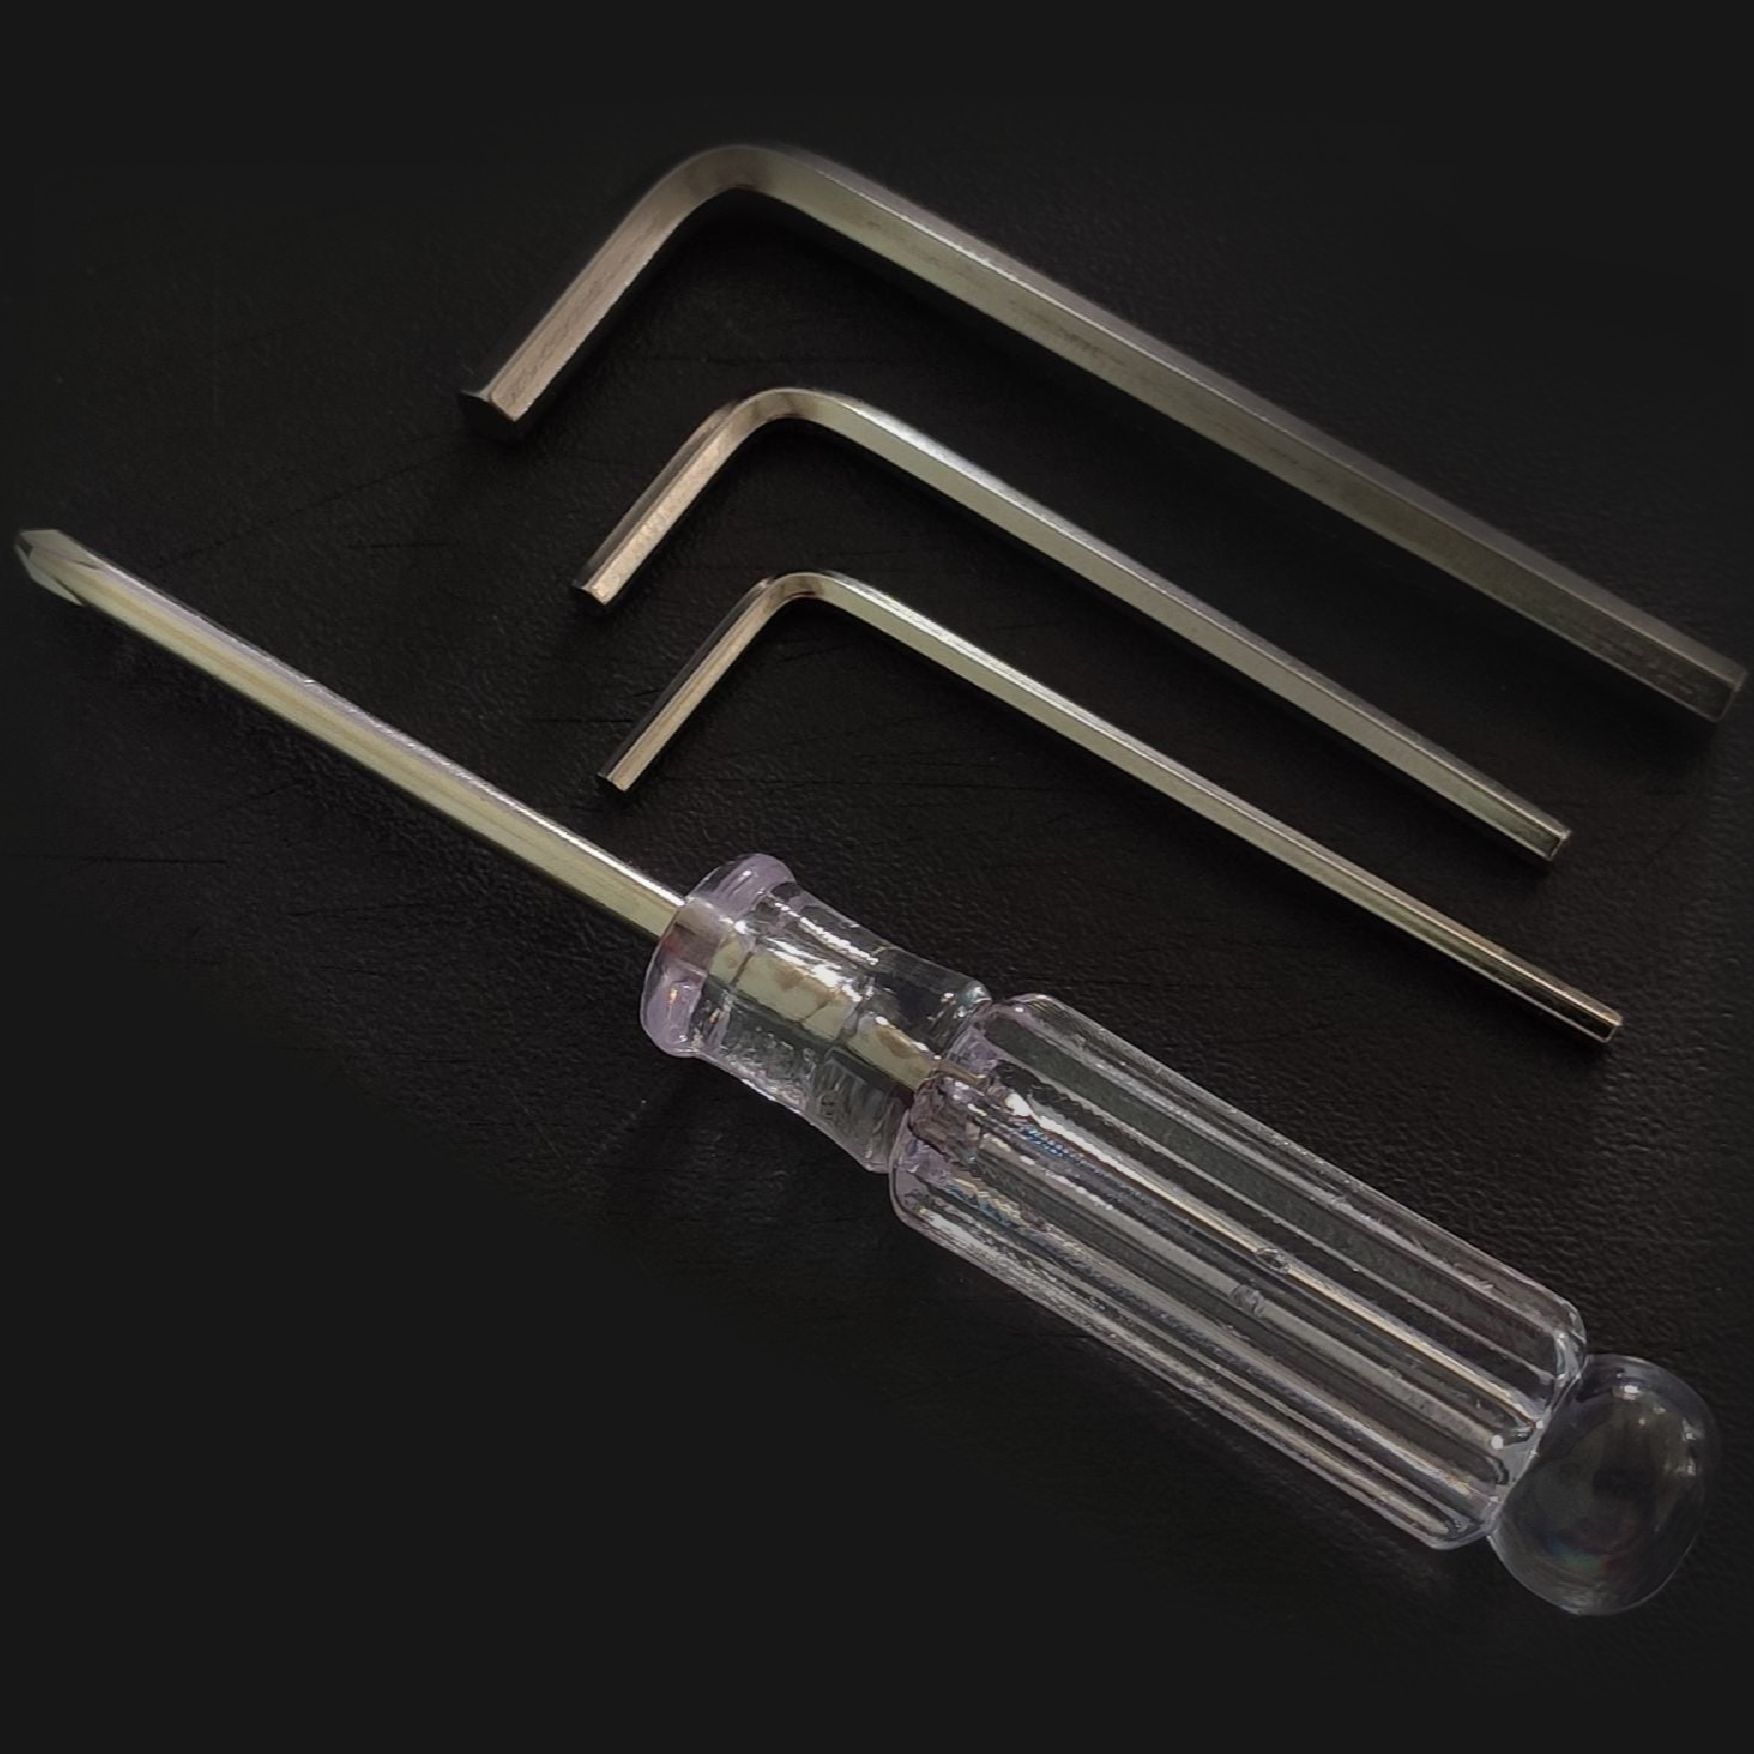
- These tools:
1 allen key H2
1 allen key H2.5
1 allen key H4
Mini Phillips screwdriver
If you don't have them, add the optional 'assembly tools' to your cart
- Logitech G923 Xbox Version
How to install the mod.
Important: logitech steering wheels, compared to others, are more complex to disassemble. Modify your steering wheel if you're sure of where to put your hands.
Watch this video and read the tutorial below to get an idea of what you need to do.
Here the video tutorial (english version 🇬🇧).
Tutorial in Italiano 🇮🇹.
How to disassemble the original steering wheel.
First you need to remove the original rim, and to do so I recommend following the step-by-step video tutorial above, but here are the main steps:
- Using a small screwdriver, remove the screws from the back of the hub, including the ones that secure the L3 and R3 buttons (LB and RB in the case of the XBOX version).
- Unscrew the 6 front screws of the cap with the logitech logo and detach the front half of the steering wheel from the base. If you are working on a G29 please read the next step carefully
- If you are working on a G29, you will notice that there is a ps3-ps4 switcher at the top of the hub (see photo). Be very careful when opening the hub and separating it from the steering wheel, as the mechanism of this switcher is delicate. To avoid breaking it, just avoid bumping it.
- Disconnect the white cable from the circuit board and then remove the circuit board from the steering wheel tray by unscrewing the small silver screws, as in the video above.
- Remove the two silver screws and the two screws on the L2\R2 buttons.
- Now that you have removed all 4 original buttons, you can start reassembling the hub, putting the circuit board back in place, screwing in the small silver screws and reconnecting the white cable. Be careful when closing the hub: make sure the white cable doesn't get pinched by some mechanism, and make sure that if you are working on a G29 the ps3-ps4 switcher mechanism is aligned and working (G923 and G920 don't have this mechanism).
- Replace the front part of the hub and screw it in with the rear screws you unscrewed at the beginning.
Now your steering wheel is ready to install the Mod Acelith.
- In the kit you will find, in a plastic bag, a black plastic spacer. The black screws and nuts are already attached to it, so don't unscrew them for now.
Put the spacer in the centre of the hub, fixing it so that it fits tightly and with the ACELITH lettering straight and facing you. In the tutorial video the spacer is different: the one you received is better, don't worry :) - Attach the spacer to the hub using the 6 large screws that were previously attached to the logitech cap. Tighten them but not too much, as the threads of the holes in the logitech base are plastic.
- Now you can mount the Acelith plate on the spacer. To do this, use the 6 black (countersunk) screws that we usually attach to the spacer so that the nuts don't come loose during shipping.
- Before tightening the screws put the 4 black buttons (included in the kit) into the 4 holes of the plate, and snap them into the mechanisms below.
These 4 black buttons have a specific arrangement.
The longer buttons go in the two holes closest to the centre of the steering wheel, and they don't have a "left and right", so stick them in the holes and rotate them until the mechanism fits, then press it down until it fits properly and doesn't slip out by itself.
The two shorter buttons, on the other hand, have a "left and right", so take one of them, insert it into one of the two remaining holes (the ones furthest from the centre of the steering wheel) and turn them until they match the mechanism. If it doesn't fit, you need to put it in the other hole. - Now, after making sure that all 4 buttons can be pressed without obstruction, securely fasten the black screws on the plate to lock it in place.
- Assembly is finished and you can customise your new mod with the stickers in the kit (black stickers, round stickers and, if you have ordered them, the race numbers and central logo).
Have fun!
For any info or problem do not hesitate to contact us.
To Italy: about 8€.
You will be able to choose from DHL, UPS, and often other options.
The price may change depending on the precise destination and timeframes are only estimates
You will receive the tracking code in the shipment confirmation email, or within 24 hours.
To Europe: from 12,90 €. (It may vary by country)
You will be able to choose from DHL, UPS, and often other options.
To UK: 5€.
Due to the current post-Brexit rules, we can only ship parcels with a value of more than 150€. In that case you can proceed to chckout (via Fedex or UPS). Customs taxes are not included, so you will be asked by the courier for payment. These rules do not depend on us, but on the new post-Brexit rules.
To USA \ Canada \ Australia \ NZ \ Japan \ Mexico: Calculated at checkout
We ship to many other countries by DHL\ UPS\FEDEX. The price varies from 25 to 50€. We recommend that you calculate the actual price directly at checkout.
We currently do not ship to South America, Africa and most of Asia for logistical reasons.
Important: Shipping times are only estimates.
Any other doubts? Write us in the chat below or visit the FAQ page