How to install a Logitech mod
How to disassemble the original steering wheel
-

1
First, begin by removing the original steering wheel. We recommend following our detailed video tutorial for a step-by-step guide.
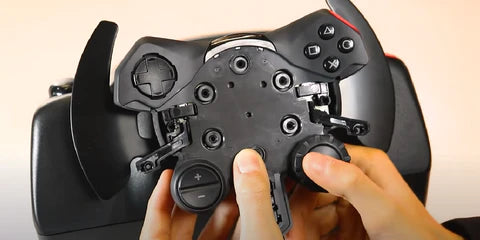
Use a small screwdriver to detach the screws located at the back of the wheel hub. This includes screws securing the L3 and R3 buttons, as well as LB and RB for the Xbox version
-
2
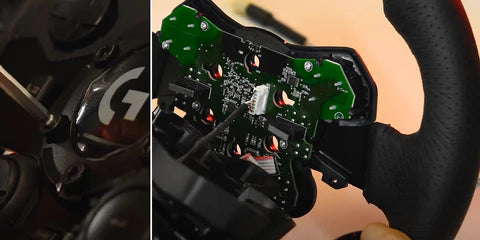
Unscrew the 6 front screws of the cap with the logitech logo and detach the front half of the steering wheel from the base. If you are working on a G29 please read the next step carefully
-
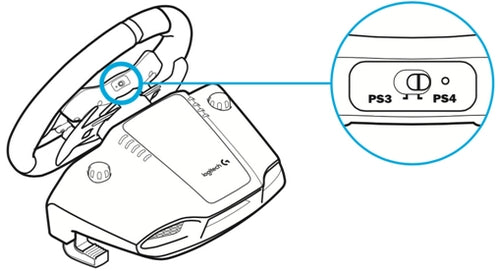
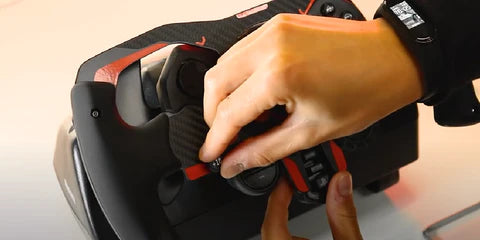
3 (for G29 only)
If you are handling a G29 model, you'll observe a PS3-PS4 switch at the top of the hub (refer to the provided photo for guidance). Exercise extreme caution while opening the hub and detaching it from the steering wheel, as the switch mechanism is quite fragile. To prevent any damage, ensure you do not bump or apply excessive force to the switch during the process
-
4
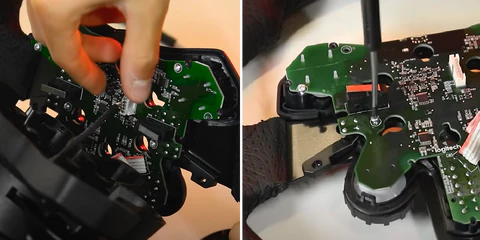
Carefully detach the white cable from the circuit board. Following this, proceed to remove the circuit board from the steering wheel tray. This can be done by unscrewing the small silver screws as demonstrated in the above video
-
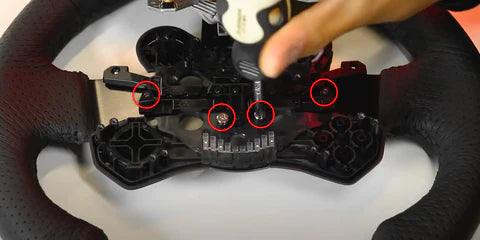
5
Remove the two silver screws and the two screws on the L2\R2 buttons.
-

6
Now that all four original buttons have been removed, begin reassembling the hub. Start by placing the circuit board back in its position, securing it with the small silver screws, and reattaching the white cable. Exercise caution while closing the hub: ensure that the white cable is not caught or pinched by any internal components. Additionally, if you are working on a G29, pay special attention to ensure that the PS3-PS4 switch mechanism is correctly aligned and functional. Note that this mechanism is not present in the G923 and G920 models
-
7
Reattach the faceplate to its original position, securing it firmly with the small screws at the rear that were removed at the start of the process


Now your steering wheel is ready to install the Acelith mod
-
1
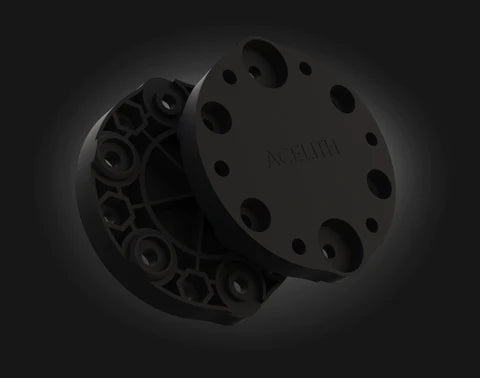
Included in your kit, inside a plastic bag, is a black plastic spacer. This spacer comes with black screws and nuts already attached; leave these as they are for now, without unscrewing them. Position the spacer at the center of the hub, ensuring it fits snugly. Make sure the 'ACELITH' lettering is aligned correctly, facing straight towards you. Note that the spacer shown in the tutorial video may appear different, but rest assured, the one you have received is an improved version
-
2
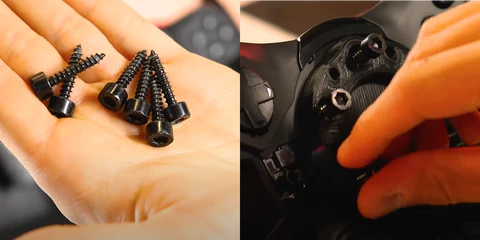
Secure the spacer to the hub using the six large screws that were originally attached to the Logitech cap. Tighten these screws adequately, but be cautious not to over-tighten them, as the threads in the holes of the Logitech base are made of plastic and can be easily damaged
-

3
Remove the 6 black countersunk screws from the spacer and use them to fix the Acelith plate onto it. The screws will grip the nuts at the back, so if you encounter problems make sure they are still there.
-
4
Before fully tightening the screws, insert the four black buttons (included in the kit) into the four designated holes of the plate. Snap each button into the mechanisms below. These buttons are designed to fit in a specific manner. The two longer buttons should be placed in the holes closest to the center of the steering wheel. These buttons do not have a designated 'left or right' orientation, so insert them into the holes and rotate until they align properly with the mechanism. Press down firmly to ensure they are securely fitted and do not slip out.
The two shorter buttons, however, are designed with a 'left and right' orientation. Take one of these buttons and insert it into one of the remaining holes (those furthest from the center of the steering wheel). Rotate the button until it aligns with the mechanism. If it doesn't fit properly, try inserting it into the opposite hole.
-

5
Now that you have ensured all four buttons can be pressed without any obstruction, proceed to firmly fasten the black screws on the plate. This will securely lock the plate in place. With the assembly now complete, you have the option to customize your new mod using the stickers provided in the kit. These include black stickers, round stickers, and, if you have ordered them, race numbers and a central logo.


