How to install the Ace One Rim on the Button Plate
-
1
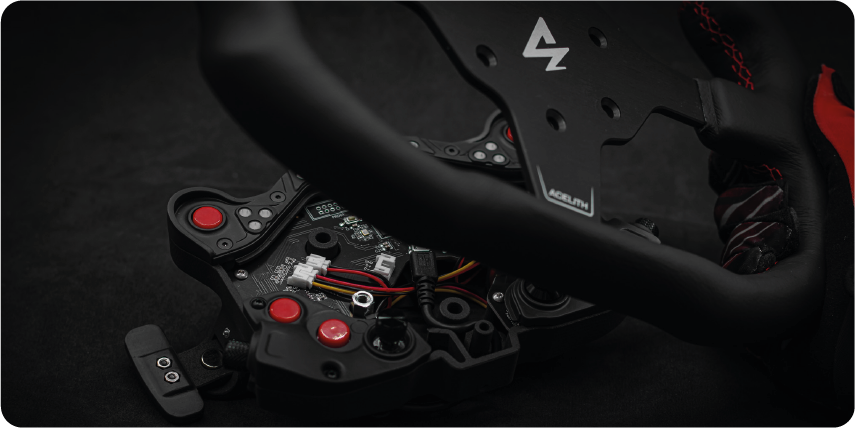
Place the Ace One rim on the button plate.
-
2
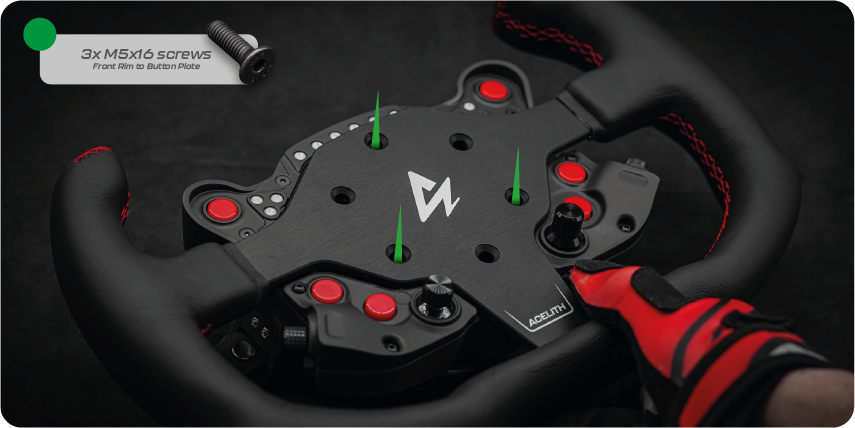
Use 3 M5x16 screws to mount the Rim on the button plate, through the 3 holes highlighted in green in the photo.
Make sure that no cables are crushed
-
3
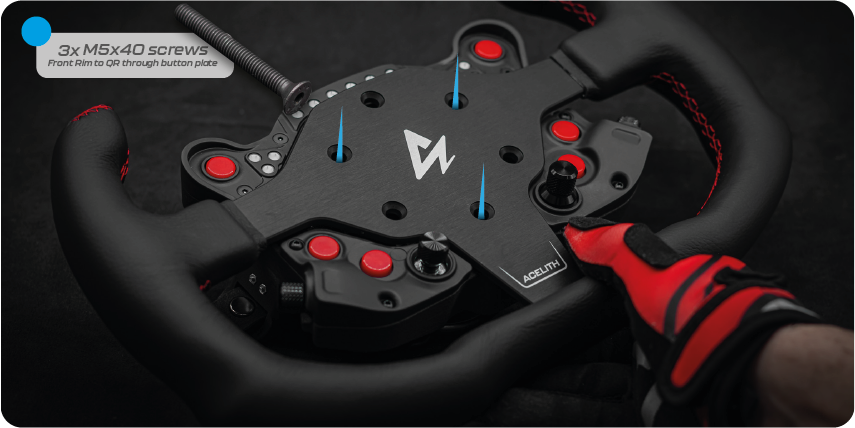
Use 3 M5x40 screws to attach the steering wheel to your QR through the 3 holes highlighted in blue in the photo
-
Notes:
In order to connect the steering wheel to your wheelbase, you must have the corresponding QR, which is in line with the 70mm wheelbase standard. Some examples: in the Fanatec ecosystem you can use the Fanatec universal hub (V1 or V2), the CSL universal hub (V1 or V2) and the podium hub; If you have a Simagic base you need a Simagic QR and so on.
In the case of Logitech or Thrustmaster bases there are no dedicated QRs, but online you can find ones made of aluminium or 3D printed. Acelith does not produce Quick Releases.
Software
-
1 - Connect the Putton Plate to the PC
Connect the steering wheel to your PC through the rear USB cable. We recommend placing a USB HUB 2.0 under or behind the wheel base or a USB extension cable.
Make sure that enough power reaches the device. Cables that are too long may need a powered USB Hub.
-

2 - Install\Update SimHub
SimHub is required. It is free software, you can download it from here: DOWNLOAD.
If you already have Simhub, you need to update it to the latest version anyway, otherwise you will not see Acelith steering wheels among the supported devices. -

3 - Synchronise SimHub
On the main screen of SimHub click on your favourite simulator and synchronise the data if required. Remember that SimHub must always be active in the background.
-
4 - Add the device to your list of devices
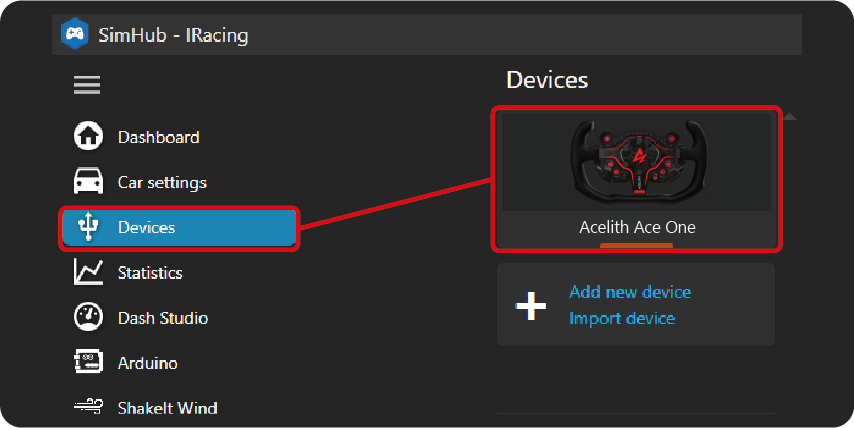
Go to DEVICES, click on IMPORT NEW DEVICE, then click on the image of the Ace One Button Plate.
Via the device screen you can manage Leds, profiles etc.
Note: It happens that despite restarting simhub, the device does not appear in the list. In this case you may have to update simhub by uninstalling the version you have on your PC.
How to install the optional dash
-
1
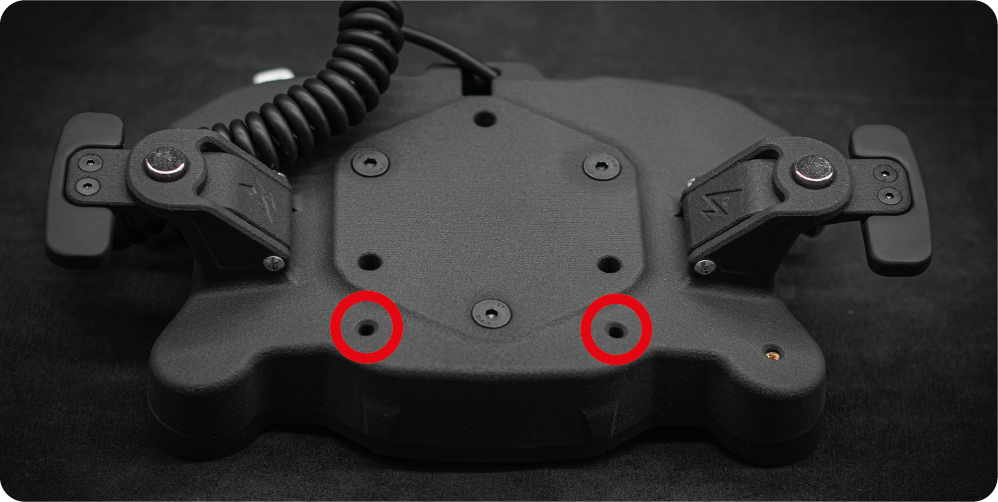
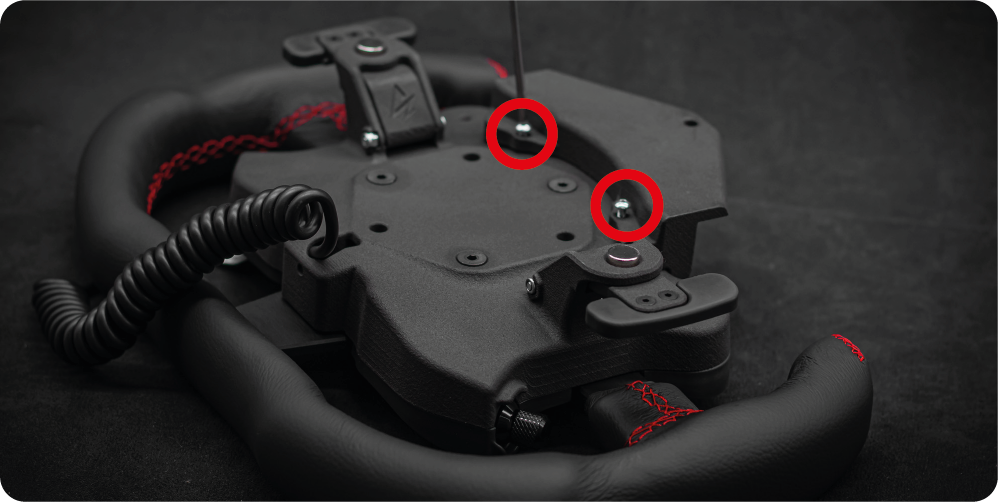
Mount the display holder on the back of the button plate, using the two holes highlighted in red in the photo.
-
2
Here is another picture of how the bracket is to be attached.
-
3
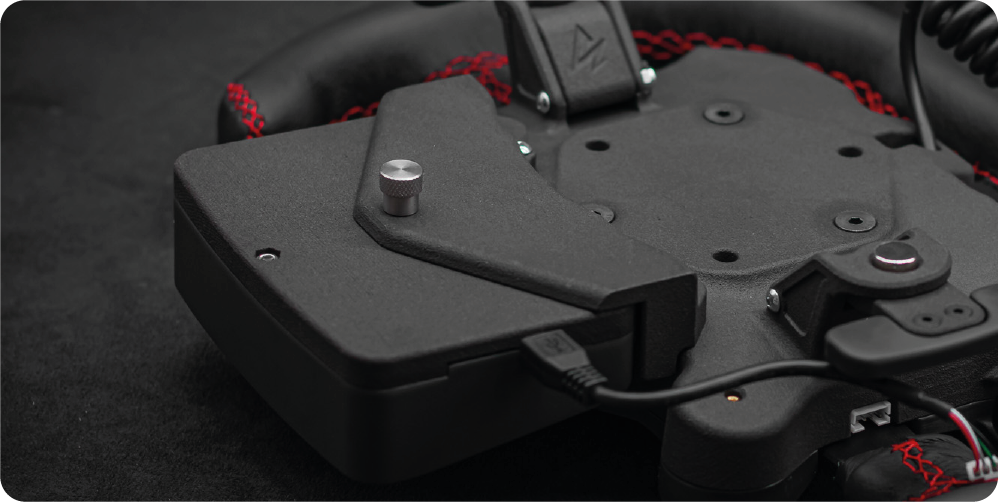
Secure the display on the holder using the aluminium knob.
-
3
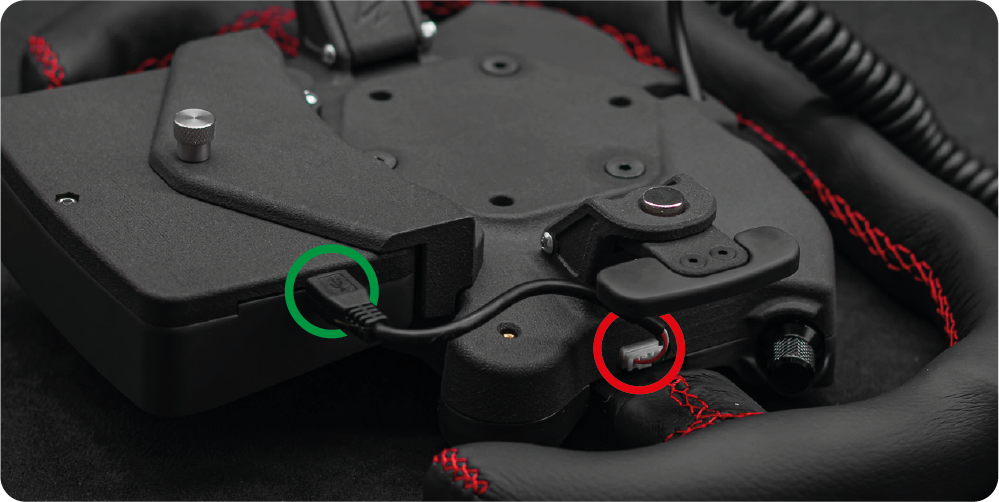
Connect the cable: one end goes into the micro-USB port located on the side of the display, the other end goes into the 4-pin JST port located to one side of the button plate under the left-hand race of the steering wheel. If you can't, you can temporarily remove the rim for easier access.
-
4
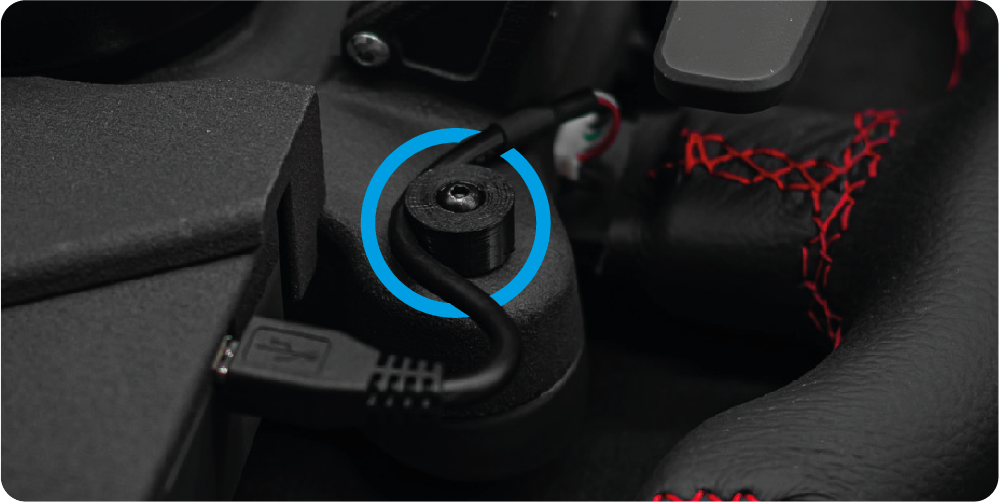
Screw the small Cable Clamp into the third hole at the rear, and fit the cable around it.
-
4
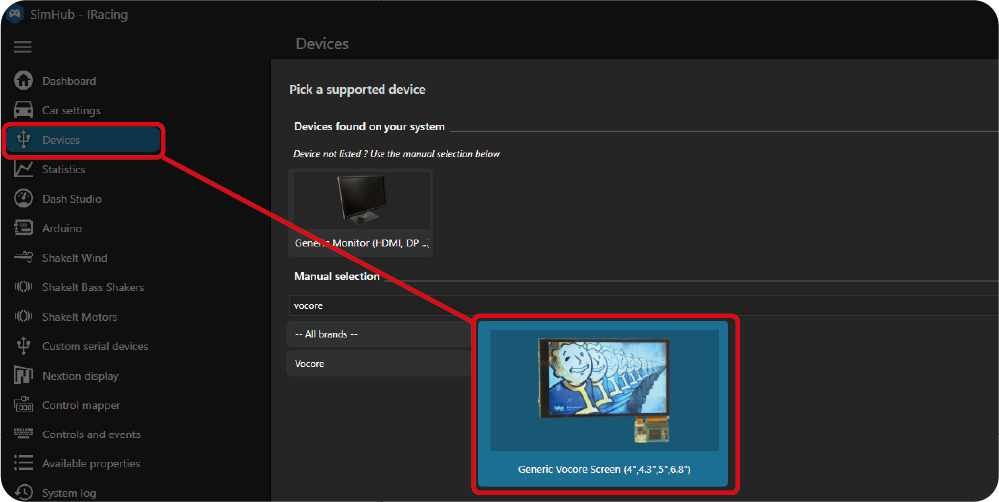
In Simhub click on ADD NEW DEVICE in the "Devices" tab in the left column, then search for the device "Generic Vocore screen".
Remember to install Vocore Screen drivers (DOWNLOAD).
In Simhub you can manage the display, rotate it 180 degrees if you see it upside down and choose which dash to show.


